If you have a muffin tin, cupcake liners and a few basic pantry staples, then you and your kids are steps away from a fun-filled afternoon making homemade peanut butter cups. Your kids will love making this copycat version of their favorite candy at home—and customizing them with an array of colorful sprinkles and toppings.
Keep reading to learn how to get started on this no-bake recipe. We’ll even share things for kids to do at every step in the recipe!
How to Make Homemade Peanut Butter Cups

These peanut butter cups are a treat, but they only require pantry staples. How great is that!
- 1-1/2 cups creamy peanut butter, divided
- 1 cup confectioners’ sugar
- 4-1/2 teaspoons unsalted butter, softened
- 1/2 teaspoon salt
- 2 cups semisweet chocolate chips
- 1 cup milk chocolate chips
- Assorted sprinkles, mini M&M’S or chopped nuts, optional
Step 1: Arrange Liners
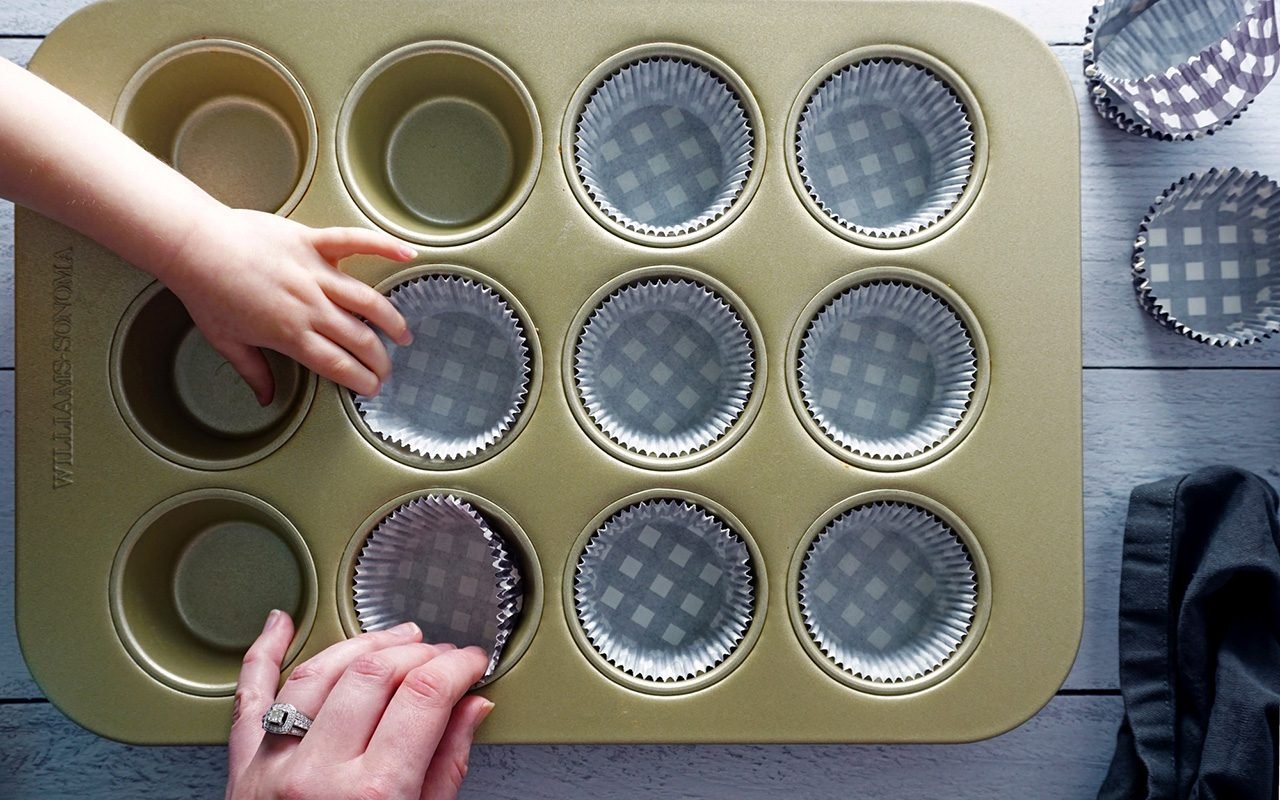
Line a standard muffin tin with paper liners. You may also use a mini muffin tin and liners if you want to make fun-size peanut butter cups.
Tip for parents: This is a great task to let your toddler or young child do! Make it educational by having them count out the liners or identify their color as they place them into the muffin tin. (If you’re new to baking with kids, this guide is a must-read.)
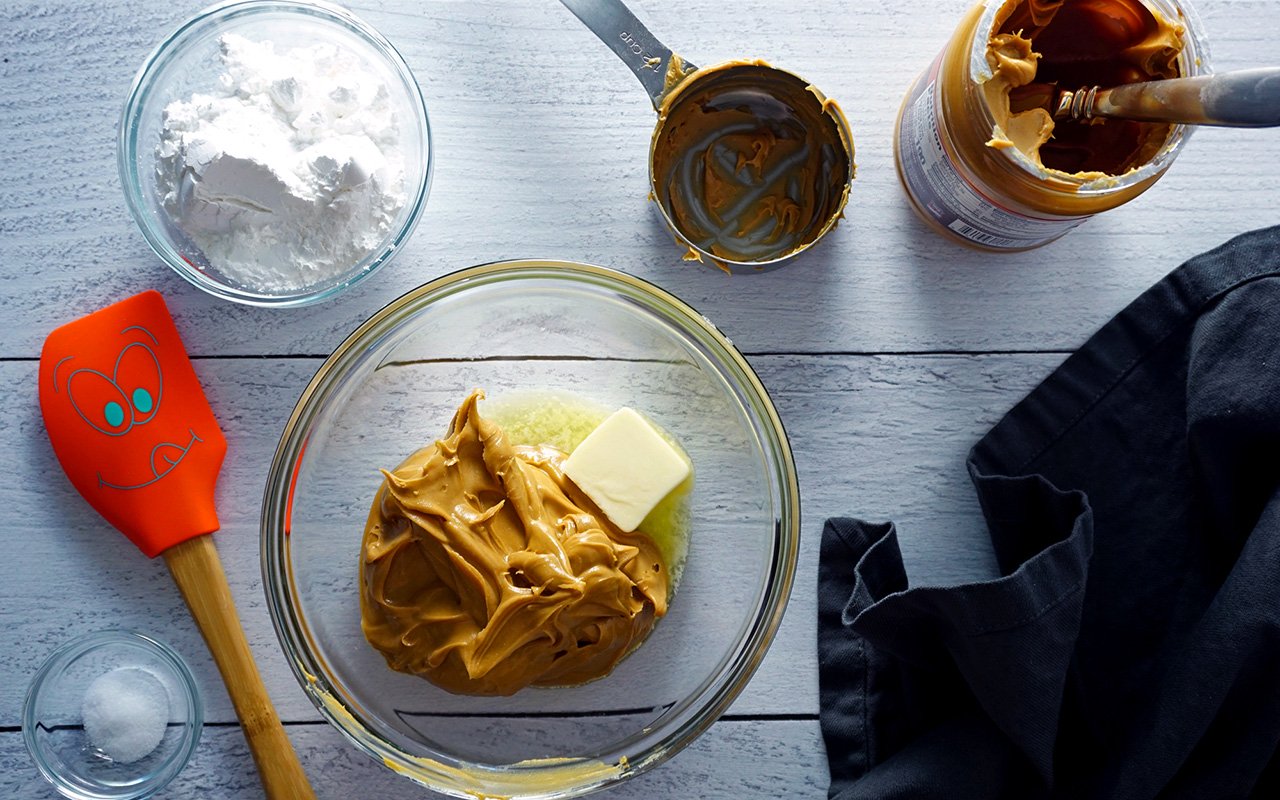
Step 2: Make the Peanut Butter Filling
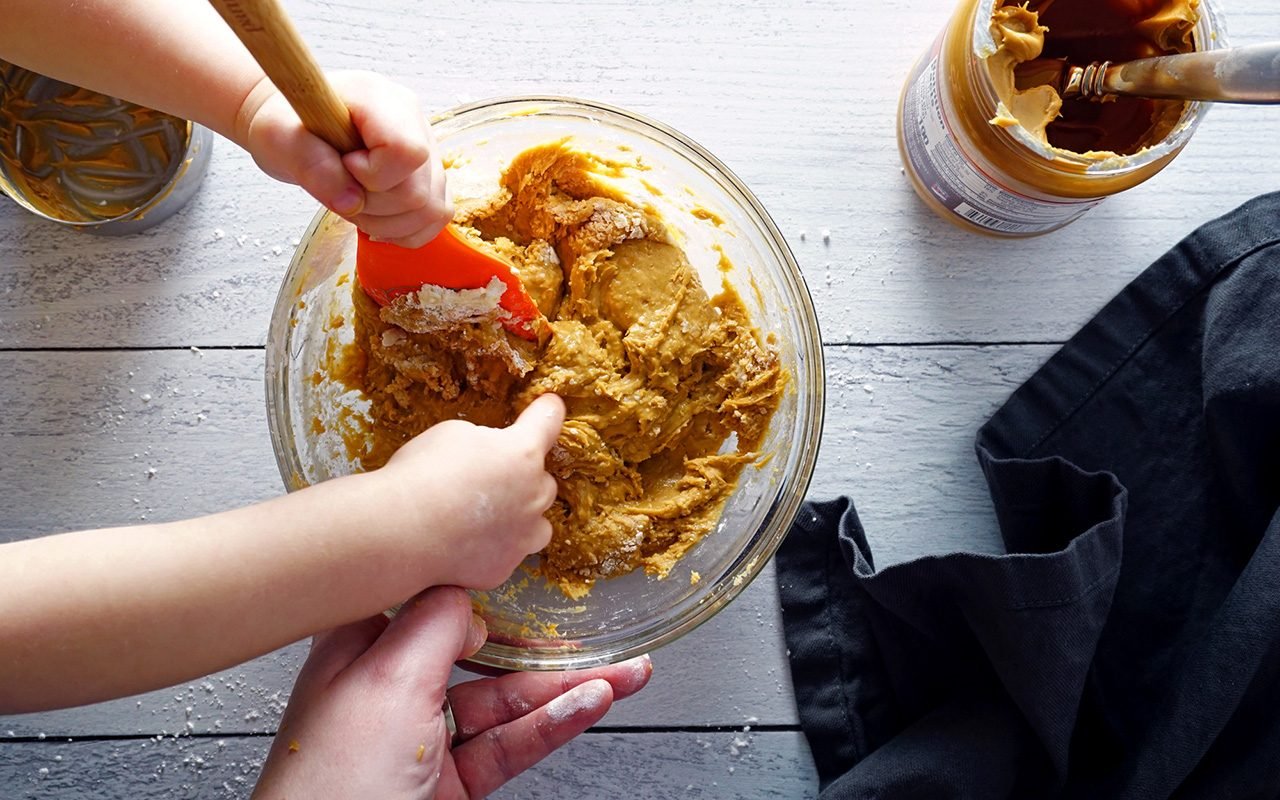
In a large mixing bowl, combine one cup of peanut butter with one cup of confectioners’ sugar, salt and softened butter. Stir with a rubber spatula until fully blended. Place the filling in the fridge to chill until ready to assemble.
Tip for parents: Take turns stirring the filling. If sharing is troublesome in your house, make it musical by letting each kid stir for one verse of their favorite song (e.g., Wheels on the Bus) before passing it on to the next family member.
Step 3: Melt the Chocolate
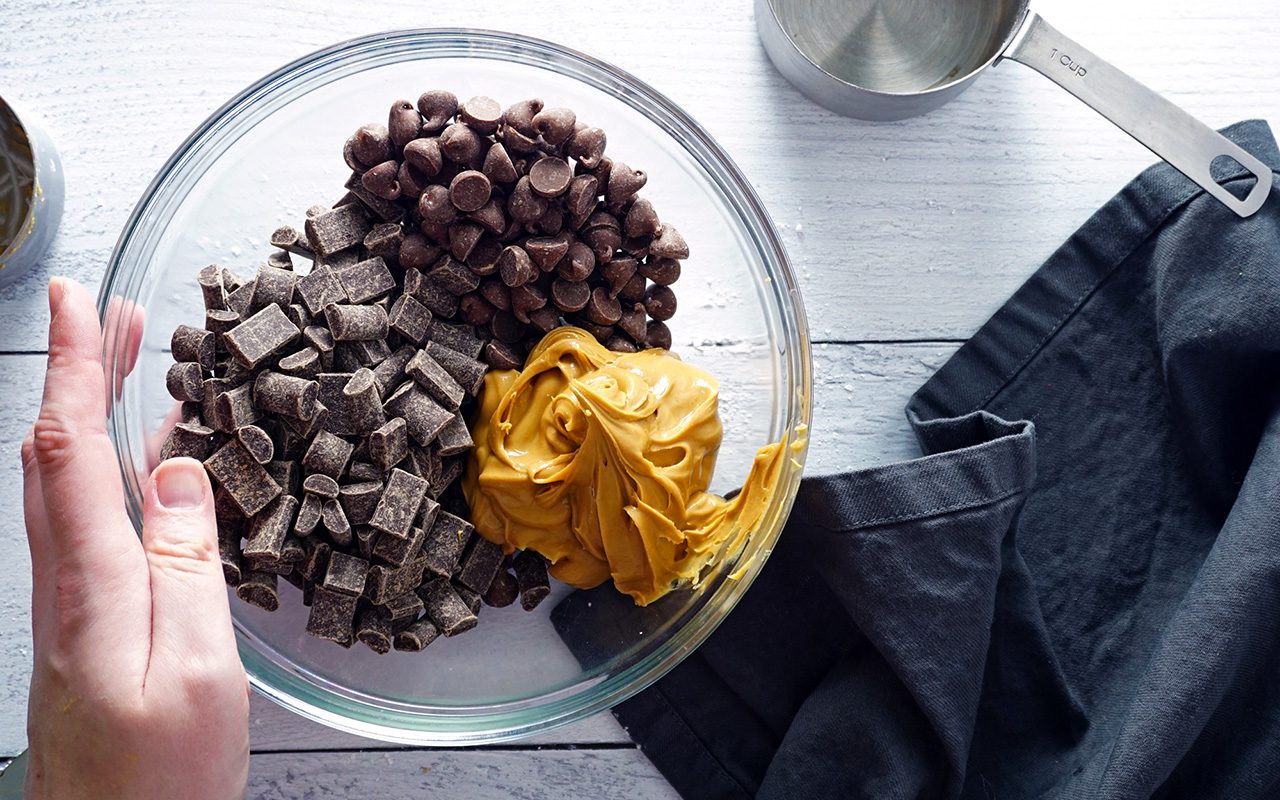
In a large, microwave-safe mixing bowl, combine the chocolate chips and the remaining half cup of peanut butter. Microwave in intervals of one to two minutes at 60% power, mixing after each session.
Repeat until the chocolate is melted and smooth, then stir to combine.

Tip for parents: Have your children practice measuring by scooping the ingredients themselves and adding them to the mixing bowl.
Step 4: Shape the Filling
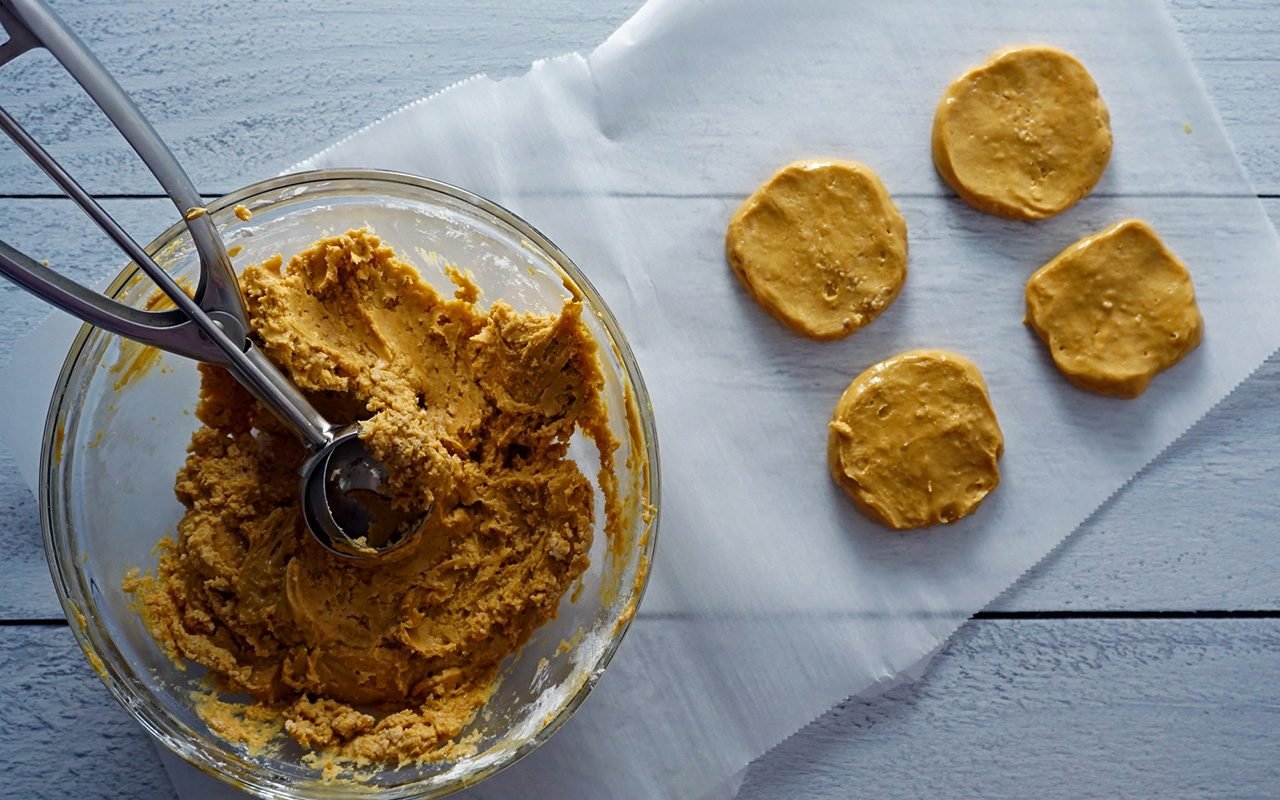
Taking about a half tablespoon of chilled filling, gently roll it into a ball using your hands. Then, using the bottom of a glass, flatten each ball of filling so it’s about 1/4-inch thick and 1-1/2 inches in diameter. Spray the bottom of the glass with cooking spray to help prevent sticking.
Tip for parents: Let your kids help roll the filling into balls for a great sensory activity. Then, turns smashing the peanut butter balls into discs using the glass. If you’re worried about broken glasses, use any plastic cup with a flat bottom for this step.
Step 5: Assemble
Fill each muffin liner with a tablespoon of melted chocolate. Then gently smack the muffin tin on the counter to help the chocolate settle smoothly and evenly in each liner. Layer each with a disc of peanut butter filling and then top with another tablespoon of melted chocolate. Spread the chocolate with a spoon to cover the filling and then gently smack the muffin tin on the counter again to help the chocolate settle evenly.
Tip for parents: Let older children help spoon the chocolate into the muffin liners. Younger kids can place the peanut butter discs on top of the chocolate. Let your kids help you make some noise by giving them a wooden spoon or rubber spatula to drum on the counter as you smack the muffin tin on the counter to settle the chocolate. Who doesn’t love a good family drum session?
Step 6: Decorate and Chill
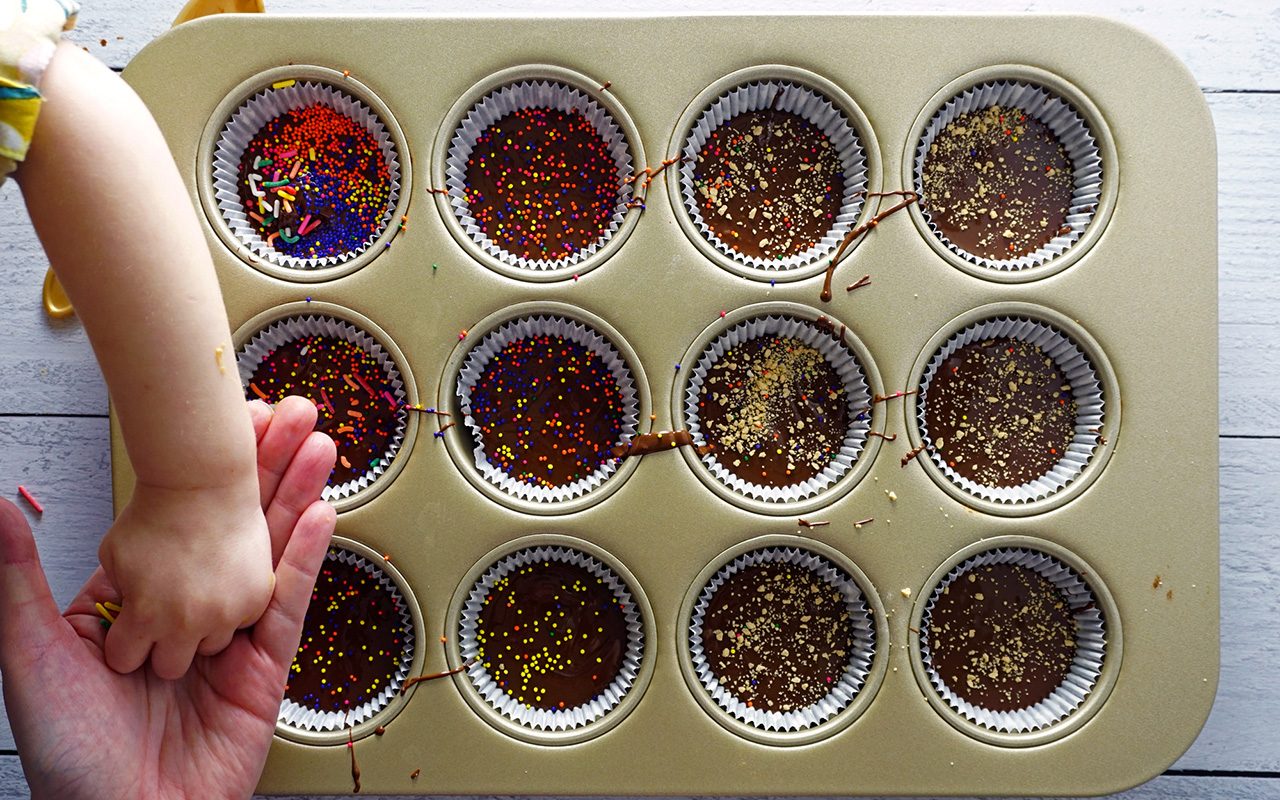
For some added fun, color and creativity, top each peanut butter cup with assorted rainbow sprinkles, mini M&M’s or chopped nuts. Then, place the peanut butter cups in the refrigerator and chill until the chocolate has set. Once set, store the peanut butter cups in an airtight container at room temperature.
Tip for parents: Let each child decorate a few of the peanut butter cups using their favorite toppings. This is a great time to practice color identification or even making letters with the M&M’s.
What to Do with Your Kids While the Chocolate Sets
Don’t forget about cleanup tasks! While the peanut butter cups chill and set, ask your kids to help carry dirty dishes to the sink. If they’re old enough, ask them to help you wash the dishes or load the dishwasher, too. It will help pass the time until it’s time for them to dig into your homemade treats.
When time is up and the cups are set, dig in! These are a great special treat to enjoy and to share with friends. Wrap a few up and give as gifts!
Next: Learn how to make monkey bread with the kiddos!
1 / 48

S’more Pops
My daughters and I came up with this treat when planning a candy-making party. They also make adorable hostess gifts, are perfect for potlucks and would sell out quickly at a bake sale. —Lisa Haboush, Geneva, Illinois

No-Bake Cereal Cookie Bars
We pull out all the goodies for these chewy bars, like raisins and coconut. For more color, sprinkle on the M&M’s once the bars are in the pan. Then press them in. —Connie Craig, Lakewood, Washington

Microwave Egg Sandwich
If you’re looking for a grab-and-go breakfast for busy days, this high-protein sandwich is low in fat and keeps me full all morning. Plus, it’s only about 200 calories! —Brenda Otto, Reedsburg, Wisconsin

Peanut Butter Popcorn Bars
If you’re looking for a fun snack for kids, try this chewy peanut butter popcorn recipe that have a mild peanut butter taste. They’re easy to mix and can be pressed into a pan to form bars or shaped into balls. —Kathy Oswald, Wauzeka, Wisconsin

Snack Mix Squares
A fun snack mix pressed into chewy bars, this treat is popular with kids of all ages. Someone is always asking me for this quick and easy recipe. —Lisa Byler, Millersburg, Indiana

Fruit and Cheese Kabobs
We came up with this fresh and fruity summer snack idea. It’s easy to make ahead and carry to the ballpark, beach or playground, and the cinnamon-spiced yogurt dip adds a fun touch kids love. —Taste of Home Test Kitchen, Milwaukee, Wisconsin

Walking Tacos
These Walking Tacos are great for an on-the-go dinner, campfire meal or easy game night supper. The ingredients transform a bag of chips into a taco in a bag! —Beverly Matthews, Pasco, Washington

South Dakota Frito Treats
Yep, they’re made with corn chips! These salty sweets were a staple after meetings at the quilt guild I belonged to in South Dakota. —Carol Tramp, Wynot, Nebraska

Homemade Peanut Butter Cups
I like using pretty mini muffin liners and topping these homemade peanut butter cups with colored sprinkles to coordinate with the holiday we’re celebrating. People can’t believe how simple it is to make this irresistible candy with gooey peanut butter centers. This is how to make homemade peanut butter cups. —LaVonne Hegland, St. Michael, Minnesota

Kids’ Favorite Chili
This third-generation hearty chili is a family favorite. It’s a sweet and easy chili that’s sure to warm up the whole family on those chilly fall nights. —Terri Keeney, Greeley, Colorado

No-Bake Chocolate Hazelnut Thumbprints
Years ago, a friend gave me a recipe for chocolate peanut treats that didn’t require baking. I thought it was a quick and clever way to whip up a batch of sweet snacks without heating up the kitchen, and I started making different variations. This one includes luscious Nutella and crunchy hazelnuts. Yum! —Lisa Speer, Palm Beach, Florida

White Chocolate Party Mix
You won’t be able to stop eating this irresistible white chocolate party mix. The light, sweet coating is great over cereal, peanuts, pretzels and M&M’s. —Norene Wright, Manilla, Indiana

Green Flop Jell-O
Get ready for fluffy lemon-lime goodness. Try it with any flavor Jell-O! —Michelle Gauer, Spicer, Minnesota

Mexi-Mac Skillet
This is the yummiest, quickest recipe I have. There’s no need to precook the macaroni. Everything comes together in one smart skillet. —Maurane Ramsey, Fort Wayne, Indiana

Creamy Frozen Fruit Cups
I love to prepare these cool, fluffy fruit cups to give a refreshing boost to many meals. They’ve been well received at family gatherings and summer barbecues. There’s no last-minute fuss since you make them well in advance. —Karen Hatcher, St. Amant, Louisiana

Watermelon Shark
Take a bite out of summer boredom with this kid-friendly food project. —Taste of Home Test Kitchen

Ranch Snack Mix
This is a wonderful fast-to-fix munchie. The recipe makes tons and doesn’t involve any cooking. It’s a cinch to package in individual snack bags, it keeps its crunch and it’s a savory alternative to the cakes and pies usually offered at bake sales. —Linda Murphy, Pulaski, Wisconsin

Hay and Straw
This recipe is not only quick and easy to prepare, it’s pretty, too. This colorful pasta dish combines julienned ham, Parmesan cheese, peas and linguine.—Priscilla Weaver, Hagerstown, Maryland

Brownie Batter Dip
I’m all about the sweeter side of dips, and this brownie-batter variety fits in with my life’s philosophy: Chocolate makes anything better. Grab some fruit, cookies or salty snacks and start dunking. —Mel Gunnell, Boise, Idaho

Strawberry-Peach Milk Shakes
You’ll need thick drinking straws to enjoy this refreshing shake, which combines two favorite fruits for a healthy, thirst-quenching treat.—Karen Edwards, Sanford, Maine

Hearty Beef Ravioli
In this fun family-friendly supper, we add our favorite taco toppings to beef ravioli. It’s easy for kids to customize their own fixings for a no-fuss meal. —Taste of Home Test Kitchen

Rainbow Spritzer
Layers of colorful fruit submerged in a fizzy, sweet beverage make this a kid-friendly sipper that gets two thumbs-up. —Taste of Home Test Kitchen

Peanut Butter Granola Pinwheels
I came across this easy and tasty snack while searching online for healthy munchies for kids. Great for after school, it’s really quick to make and filling enough to hold the kids until dinner. To satisfy heftier appetites or to serve as a power lunch, cut each tortilla into fewer pieces or provide one per child. The recipe is easy to increase as needed. —Mary Haluch, Ludlow, Massachusetts

Fluffy Scrambled Eggs
When our son, Chris, wants something other than cold cereal in the morning, he whips up these eggs. Cheese and evaporated milk make them especially good. They’re easy to make when you’re camping, too. —Chris Pfleghaar, Elk River, Minnesota

Chocolate-Hazelnut Fruit Pizza
You can prepare this snackable pizza in just 10 minutes! It’s a fun way to sneak in those daily servings of fruit. —Dalynn Dowling, Grand Forks AFB, North Dakota

Raspberry Cheesecake Floats
I’ve yet to meet a cheesecake I didn’t like! The flavors here of cream cheese and raspberries create an ideal combination. Although ice cream floats are summery, I like this treat so much that I whip it up during the winter, too. —Deirdre Cox, Kansas City, Missouri

Favorite Sloppy Joes
I’ve prepared these sandwiches for years. I’ve tried many sloppy joe recipes, but this one is the best by far. It also travels well for picnics or potlucks. —Eleanor Mielke, Snohomish, Washington

Chocolaty Chips
My two little guys can’t get enough of this sweet-and-salty snack, which uses just three ingredients and is ready to eat in 15 minutes. The boys like to drizzle on the melted chocolate, too. Sometimes we replace the potato chips with apple slices. —Jami Geittmann, Greendale, Wisconsin

Spaghetti Tacos
My son watches a show where the kids eat spaghetti tacos. As a joke, I made him his own, and now these tacos are here to stay. —Mindie Hilton, Susanville, California

Strawberry Watermelon Slush
We like to relax on the back porch with glasses of my slush after a long, hot day. Strawberries and watermelon blend up with lemon juice and sugar for an instant refresher. —Patty Howse, Great Falls, Montana

Stuffed PB&J French Toast Kabobs
I turned peanut butter and jelly into French toast. Cut up and skewer these nifty sandwiches. You win the crown for creative parent of the year. Check out my blog, nibblesbynic.com, for more fun food ideas. —Nicole Meyer, Roslyn, New York

Candy Craze Ice Cream Sandwiches
These ice cream sandwiches have a little bit of everything in them to satisfy all your cravings. —Lauren Knoelke, Milwaukee, Wisconsin

Pretzel Dessert
Save both time and money with a big batch of this sweet and salty, creamy and crunchy treat. Any dessert that is left over is super the next day, too. —Rita Winterberger, Huson, Montana

Stovetop Macaroni and Cheese
When I was a girl, Mama used Texas longhorn cheese in this recipe. After it melted all over the macaroni, I loved to dig in and see how many strings of cheese would follow my spoonful. —Imogene Hutton, Brownwood, Texas

Peanut Butter Chocolate Dessert
The desserts of my dreams have both chocolate and peanut butter. So, when I came up with this rich chocolate peanut butter dessert, it quickly became my all-time favorite. It’s a cinch to whip together because it doesn’t require any baking. My family loves this chocolate peanut butter cup lasagna! —Debbie Price, LaRue, Ohio

Microwave Pickles
You can enjoy a small batch of these sweet crunchy pickles anytime without the work of traditional canning methods. They’re loaded with flavor and so easy to make. —Marie Wladyka, Land O’Lakes, Florida

Strawberry-Citrus Freezer Pops
I knew that clementines and strawberries would create a luscious combination in a fruit pop, and I have to say these are delicious! —Colleen Ludovice, Milwaukee, Wisconsin

Cool and Creamy Watermelon Pie
This simple pie is so refreshing that it never lasts long on warm summer days. Watermelon and a few convenience items make it a delightful dessert that doesn’t take much effort. —Velma Beck, Carlinville, Illinois

Cherry No-Bake Cookies
I’ve always loved my no-bake cookie recipe, but I was never able to place at the fair with it. So I mixed in some maraschino cherries, added a few drops of almond extract, and voila! We won a blue ribbon at the county fair in 2010. —Denise Wheeler, Newaygo, Michigan

Peanut Butter Milk Shakes
You’ve got milk, peanut butter, and probably vanilla ice cream, too. Using just a few ingredients, you can whip up this peanut butter milkshake recipe in seconds. —Joyce Turley, Slaughters, Kentucky

Frozen Banana Cereal Pops
When we want a healthy snack, we dip bananas in yogurt, roll ’em in cereal, then freeze. Ta-da! —Scarlett Elrod, Newnan, Georgia

Cheesy Quesadillas
We serve these quesadillas as chili dippers or load them up with salsa and sour cream for a super starter. —Terri Keeney, Greeley, Colorado

Gooey Caramel-Topped Gingersnaps
Making these cookies is therapeutic for me. I often watch a movie while I put them together. I take a lot of cookies to fundraisers, and these gingersnaps are quite popular. If you’d like, you can make variations by changing the cookie base or varying the nuts. —Deirdre Cox, Kansas City, Missouri

ABC Cheese Dip
My children like this dip because the seasoning is mild. You can use plain veggie sticks or cut out numbers and letters from the sweet peppers. —Kimberly Miller, Norfolk, Virginia

Frosty Peanut Butter Pie
With only a handful of ingredients, this peanut butter pie promises to deliver well-deserved compliments. Whenever I bring this creamy, make-ahead pie to get-togethers, I’m asked for the recipe. —Christi Gillentine, Tulsa, Oklahoma

Pizza Wraps
This recipe features the flavors of your favorite pie but only takes a few minutes to make—and there’s no cooking or baking required. Perfect for when you’re rushing to get kids on the bus! —Elizabeth Dumont, Boulder, Colorado

Chocolate Peanut Butter Crunch Bars
My twist on rice crispy bars includes crunchy crushed pretzels. Then I top them with a creamy peanut butter coating and rich chocolate topping. Garnished with peanuts and even more pretzels, I don’t think I’d ever go back to plain old bars again. —Sherri Melotik, Oak Creek, Wisconsin

Cool Watermelon Pops
The kids are going to flip for the miniature chocolate chips in these picture-perfect pops. They’re almost too cute to eat (but you’ll be glad you did). —Taste of Home Test Kitchen
The post How to Make Homemade Peanut Butter Cups with Your Kids appeared first on Taste of Home.
This step-by-step guide explains how to homemade peanut butter cups with kids. It even includes things for kids to do at every step of the recipe!
The post How to Make Homemade Peanut Butter Cups with Your Kids appeared first on Taste of Home.329667, Candy, Dishes & Beverages, How To, Test Kitchen